Wednesday, 28 November 2007

Autumn colours

It's such a long time since I blogged, I've completely forgotten how to do things - so here goes.

A couple of weeks ago Tony and I went to Sheffield Park, a National Trust property, famed for it's autumn colours. It was a beautiful sunny but cold Tuesday. We thought there wouldn't be many people there ( we are new to this retired stuff), but it was heaving!

The colours were absolutely amazing, probably close to their best.


Just couldn't resist taking lots of pictures, especially going right into the trees and catching the sun. I picked up some leaves, but they loose their colours.

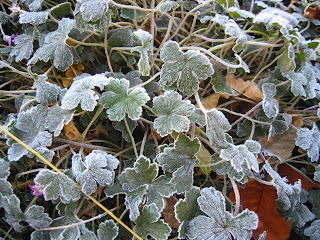
In complete contrast, a few days later I took the next few pictures in our garden after a frost.


The last few days its never really got light - grey and rainy - very depressing.

I've been to several workshops in the last few weeks, first one in the next blog.

Saturday, 23 June 2007

Rebooting my blog!!

The last six months or so have been a bit of a creative desert because of one health problem after another! The one high spot was an incredible 3 weeks in New Zealand to celebrate my husband's retirement (he insists I add early!!). Came back feeling like a new woman and then fell getting off my exercise bike (don't laugh), hurt my back, and haven't been able to do a thing for weeks except read. It's still sore and my doctor has referred me for physiotherapy.
But at last, I am working again.
Let's start with some images from New Zealand. Firstly, this is the Maori Meeting House at the Treaty Grounds at Waitangi. They are very dark inside, and have a real sense of spirituality. All along the walls are ancestral carvings, and between them are tukutuku panels.

They were made using crossed laths, horizontal at the front and vertical at the back, held together be decorative stitching using strips of flax or grass. Two women worked together, one at the front of the panel, one at the back, and the strips of flax were "stitched" through the gaps between the laths to create the cross stitch patterns.


The patterns all have spiritual meanings.

In Te Papa, the National Museum of new Zealand in Wellington, there are some modern interpretations of tukutuku panels, using traditional techniques, but non-traditional colours. No photography allowed I'm afraid.

At the Art Gallery in Christchurch, we were lucky enough to see an exhibition of cloaks and baskets by contemporary Maori weavers/artists. The exhibition was called The Eternal Thread and has been to the US. It was really inspiring, particularly the cloaks, but once again no pictures I'm afraid.

Saturday, 20 January 2007

Computer Design Course

The one good thing about this course is it starts right at the very beginning and assumes you know nothing about using the Paint Shop Pro programmes. I have version 9 and I really haven't used it at all.

The first module is about line, so the first thing is to learn how to use the various brushes, how to alter shape, size, colour and quality.


Then how to use the effects menu. These effects are very seductive, and it's very easy to get really carried away with them, because they create images so quickly.


Module 2 is about designing with primary colour and about using layers to build up designs. Once again there is a whole range of effects and blends you can use. This started off as 3 vertical stripes of red, yellow and blue, which was then copied onto a second layer, rotated through 90 degrees and then blended. The lines were added on a third and fourth layer and once again blended.


This one started off in the same way, but uses an effect called weave, as well as various brush effects.


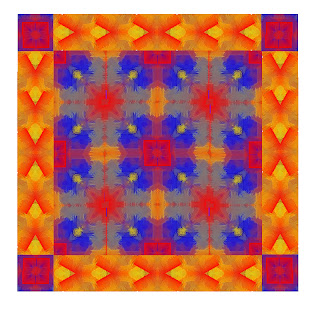
Then it's about generating pattern, using the pattern generator in the programme, but also using cut and paste, rotate and flip to create patterns and borders


I'm currently working on Module 3, which has a design project based around fences, and which can include any of the techniques we've learnt. The module also covers printing on various media. There are two stitched pieces to be done.
Off on Friday for a day with out tutor, to "play"!!

Tuesday, 9 January 2007

Stitch samples

I've decided not to do the Take a Stitch Tuesday challenge. It's a wonderful idea, but just another opportunity for not getting on with what I really should be doing!

Here is a series of samples I did using chain stitch, all of which have just been posted off to my tutor. I absolutely loved doing them, but I could have done loads more!


Sunday, 7 January 2007

Collograph 2

At last, I have been able to get back to doing things. Christmas preparations took over needless to say, and then I got a tummy bug, which I took ages to get over.
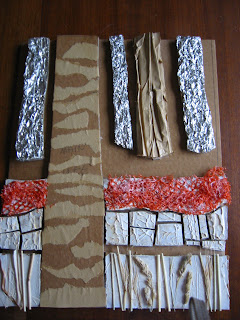
So, here is the completed collograph, everything stuck down and varnished and ready to print. I made each of the elements separately, and stuck them down using double-sided tape. I just used the varnish my husband had in the garage - it was a quick drying satin varnish, but I don't think it's critical!
.
I found making the collograph quite difficult. Everything has to be level or it won't print properly, but I found different papers can make a big difference.
Firstly I tried ordinary copy paper, I laid the collograph on the paper and then used a roller. The result was OK, but it didn't make the most of the texture. Then I tried laying the paper on the collograph, but it moved about too much, and you get a double image.
Then I tried some handmade papers, which are much softer. I laid the paper on top of the collograph and used my fingers and the side of my hand to press down. You can really get the paper down into the textures and I was really quite pleased with the results. I also tried it with tissue paper and that also works really well.
The first below is the handmade paper, and the second is the tissue paper, which I crumpled up before I made the print.
So I have to pack everything up now and send it off to my tutor. I hate packing my work up and putting it in the post. I'm always so relieved when it arrives. It takes me long enough to do the work in the first place, let alone having to redo it because its been lost in transit!!

Saturday, 16 December 2006

Collograph 1

So picture me, youngest son in attendance, logging in to get him to help me upload pictures, only to find that I now have a toolbar, complete with picture icon, which was absolutely NOT THERE last time I looked. Needless to say, youngest son has yet another example of Mother going soft in the head!


Purple Missus asked what is a collograph. Basically, its a collage that you make prints from, so texture is all important. Everything has to be the same height, otherwise it won't print, so something that is a good texture won't necessarily print well.


The brief for my collograph was to make a print based on a textural study of a particular area, and I made a series of drawings, rubbings, and prints and took lots of photographs of the garden of the house we stayed at in southern France earlier this year.


What you have to do is stick stuff to cardboard, let the glue dry, then varnish it. These are some varnished blocks, ready for printing from. I used kitchen foil, sandpaper, pumpkin seeds, grasses, and gesso.


I printed the blocks using black acrylic paint with a bit of fluid retarder mixed in to make the paint last a bit longer. (Works quite well) The first lot are an attempt at creating a bark texture using scrunched up brown paper (left) and sandpaper. I started off with quite a fine sandpaper, then tried it with a much coarser sandpaper, but unexpectedly, the finer sandpaper is better. The next ones are made with thick piping cord. The one on the right the block moved, hence the double image.


This next one I used scrunched up kitchen foil to create tree bark, some vegetable nets to create moss on a wall, and some wonderful textured cardboard which arrived as packaging, but was extremely disappointing. Below that are some prints made from gesso blocks, which were an attempt at creating a stone wall. I layered gesso onto the card and then made marks in the gesso, but didn't find them very successful. In the end, I cut the blocks up into individual "stones" and stuck them down separatly , which I was much happier with.


Next step was to make a mock up of the finished collograph. The brief was to design a book cover for a book about texture, aiming to give a sense of place of the area I had studied. This was the second attempt.


All I have to do now is make the final block and make three prints, at least one of which has to be black and white. Going to finish my Christmas shopping on Monday, so will include a trip to the art shop to look for some hand made papers.

Sunday, 3 December 2006

RATS!!

Not a happy bunny this morning!
Have spent the last hour trying to find out how to upload photographs - and failed!well I did say that I am not very computer literate. Youngest son will help me sort it out - no doubt it will only take him a second.
I have been working on a collograph, part of my textures module. I've been creating various textures by sticking things to pieces of card, but I am finding it really difficult. Something with a really good texture doesn't necessarily print well. And its such a slow process - first you have to wait for the glue to dry before you can varnish, then you have to wait for the varnish to dry before you can print.
Varying success - crumpled cooking foil makes a really good bark texture, dried grasses make a lovely block - but is it a texture? Tried various grades of sandpaper to give the effect of lichen on a tree trunk. Surprisingly, I'm getting better results from a finer, rather than a courser grade, which is not what I would have expected at all.
Photographs have been taken, and will be posted, once I find out how!!