Friday 14 December 2007

A pre Christmas treat

Last week, we went to Cologne to the Christmas markets, of which there are 5. The biggest one is in the square by the Cathedral, which is incredibly tall. One of the towers had scaffolding around part of it, which I thought echoed the gothic tracery. (sorry the picture is a bit blurred.)

The markets are full of wonderful traditional Christmas decorations, presents and food, and there is a little land train that runs between them which you can hop on and off.

This is the Altermarkt - Old Market. The stalls are open from 11am to 9pm, and this was taken just after they opened which is why the market looks so deserted.

There is also a Medieaval market at the Chocolate Museum. The stalls here are tents, and all the stall holders wear medieaval costume. A lot of them are demonstrating their crafts - felt making, blacksmithing, candle making etc.

We didn't go into the Chocolate Museum - too much temptation!!

One of the best things about the Christmas markets is the gluewein - mulled wine which you buy in specially designed pottery mugs. Each market has its own mugs, and they are generally dated, so different designs each year. This is the fifth time we've been, so I have a whole collection of mugs, which I generally use in December. Also did most of my Christmas shopping!

Sunday 2 December 2007

Batik

I first had a go at batik at art school in the 1960s, and have done it occassionaly over the years, but not for ages. The local patchwork shop, Puddleducks in Sevenoaks, does lots of workshops and classes, and I signed up for a one day workshop on batik.
The morning was spent making a sampler, using undressed cotton lawn, and exploring the various ways of mark making with the wax - all sorts of brushes, including a toothbrush, and even a dishwashing brush, as well as tjantings. The second and third squares in the second row were just waxed all over. We then painted the squares with procions dyes , using light colours.
Once it was dry, we rewaxed. The third square in the second row was etched into to create the lines. Then we dyed again, this time using stronger colours.
We then waxed it all over, crumpled it as much or as little as we wanted, to crack the wax. The second square in the second row was crumpled quite heavily. Then the whole thing was put into a dark blue dye bath.
The final process is to iron off the wax, with the batik between several layers of newsprint. Eventually, after several changes of paper, most of the wax comes out.
The second piece is based on a drawing I did in France in September, whilst I was sitting by the pool - well someone has to do it! The view was a series of stripes, 3 or 4 in the pool itself, the fields, the trees and the hills beyond.

This was done very quickly, without a great deal of thought - normally I like to give things a bit of thought. The original drawing was much narrower than this, and I think I might select part of the left side and mount it.

The class has certainly rekindled my interest in batik - I love the immediacy and the simplicity of batik - but I'm struggling to find undressed cotton lawn. Any suggestions would be appreciated.

Wednesday 28 November 2007

Autumn colours

It's such a long time since I blogged, I've completely forgotten how to do things - so here goes.

A couple of weeks ago Tony and I went to Sheffield Park, a National Trust property, famed for it's autumn colours. It was a beautiful sunny but cold Tuesday. We thought there wouldn't be many people there ( we are new to this retired stuff), but it was heaving!

The colours were absolutely amazing, probably close to their best.


Just couldn't resist taking lots of pictures, especially going right into the trees and catching the sun. I picked up some leaves, but they loose their colours.

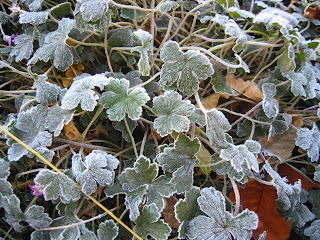
In complete contrast, a few days later I took the next few pictures in our garden after a frost.


The last few days its never really got light - grey and rainy - very depressing.

I've been to several workshops in the last few weeks, first one in the next blog.

Saturday 23 June 2007

Rebooting my blog!!

The last six months or so have been a bit of a creative desert because of one health problem after another! The one high spot was an incredible 3 weeks in New Zealand to celebrate my husband's retirement (he insists I add early!!). Came back feeling like a new woman and then fell getting off my exercise bike (don't laugh), hurt my back, and haven't been able to do a thing for weeks except read. It's still sore and my doctor has referred me for physiotherapy.
But at last, I am working again.
Let's start with some images from New Zealand. Firstly, this is the Maori Meeting House at the Treaty Grounds at Waitangi. They are very dark inside, and have a real sense of spirituality. All along the walls are ancestral carvings, and between them are tukutuku panels.

They were made using crossed laths, horizontal at the front and vertical at the back, held together be decorative stitching using strips of flax or grass. Two women worked together, one at the front of the panel, one at the back, and the strips of flax were "stitched" through the gaps between the laths to create the cross stitch patterns.


The patterns all have spiritual meanings.

In Te Papa, the National Museum of new Zealand in Wellington, there are some modern interpretations of tukutuku panels, using traditional techniques, but non-traditional colours. No photography allowed I'm afraid.

At the Art Gallery in Christchurch, we were lucky enough to see an exhibition of cloaks and baskets by contemporary Maori weavers/artists. The exhibition was called The Eternal Thread and has been to the US. It was really inspiring, particularly the cloaks, but once again no pictures I'm afraid.

Saturday 20 January 2007

Computer Design Course

The one good thing about this course is it starts right at the very beginning and assumes you know nothing about using the Paint Shop Pro programmes. I have version 9 and I really haven't used it at all.

The first module is about line, so the first thing is to learn how to use the various brushes, how to alter shape, size, colour and quality.


Then how to use the effects menu. These effects are very seductive, and it's very easy to get really carried away with them, because they create images so quickly.


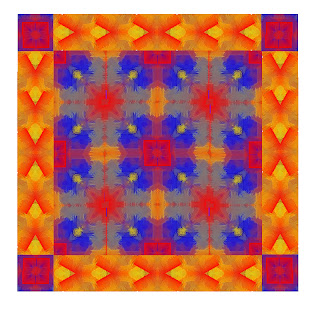
Module 2 is about designing with primary colour and about using layers to build up designs. Once again there is a whole range of effects and blends you can use. This started off as 3 vertical stripes of red, yellow and blue, which was then copied onto a second layer, rotated through 90 degrees and then blended. The lines were added on a third and fourth layer and once again blended.


This one started off in the same way, but uses an effect called weave, as well as various brush effects.


Then it's about generating pattern, using the pattern generator in the programme, but also using cut and paste, rotate and flip to create patterns and borders


I'm currently working on Module 3, which has a design project based around fences, and which can include any of the techniques we've learnt. The module also covers printing on various media. There are two stitched pieces to be done.
Off on Friday for a day with out tutor, to "play"!!

Tuesday 9 January 2007

Stitch samples

I've decided not to do the Take a Stitch Tuesday challenge. It's a wonderful idea, but just another opportunity for not getting on with what I really should be doing!

Here is a series of samples I did using chain stitch, all of which have just been posted off to my tutor. I absolutely loved doing them, but I could have done loads more!


Sunday 7 January 2007

Collograph 2

At last, I have been able to get back to doing things. Christmas preparations took over needless to say, and then I got a tummy bug, which I took ages to get over.
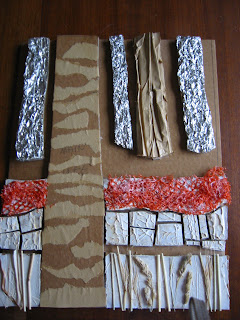
So, here is the completed collograph, everything stuck down and varnished and ready to print. I made each of the elements separately, and stuck them down using double-sided tape. I just used the varnish my husband had in the garage - it was a quick drying satin varnish, but I don't think it's critical!
.
I found making the collograph quite difficult. Everything has to be level or it won't print properly, but I found different papers can make a big difference.
Firstly I tried ordinary copy paper, I laid the collograph on the paper and then used a roller. The result was OK, but it didn't make the most of the texture. Then I tried laying the paper on the collograph, but it moved about too much, and you get a double image.
Then I tried some handmade papers, which are much softer. I laid the paper on top of the collograph and used my fingers and the side of my hand to press down. You can really get the paper down into the textures and I was really quite pleased with the results. I also tried it with tissue paper and that also works really well.
The first below is the handmade paper, and the second is the tissue paper, which I crumpled up before I made the print.
So I have to pack everything up now and send it off to my tutor. I hate packing my work up and putting it in the post. I'm always so relieved when it arrives. It takes me long enough to do the work in the first place, let alone having to redo it because its been lost in transit!!