Saturday, 20 January 2007

Computer Design Course

The one good thing about this course is it starts right at the very beginning and assumes you know nothing about using the Paint Shop Pro programmes. I have version 9 and I really haven't used it at all.

The first module is about line, so the first thing is to learn how to use the various brushes, how to alter shape, size, colour and quality.


Then how to use the effects menu. These effects are very seductive, and it's very easy to get really carried away with them, because they create images so quickly.


Module 2 is about designing with primary colour and about using layers to build up designs. Once again there is a whole range of effects and blends you can use. This started off as 3 vertical stripes of red, yellow and blue, which was then copied onto a second layer, rotated through 90 degrees and then blended. The lines were added on a third and fourth layer and once again blended.


This one started off in the same way, but uses an effect called weave, as well as various brush effects.


Then it's about generating pattern, using the pattern generator in the programme, but also using cut and paste, rotate and flip to create patterns and borders
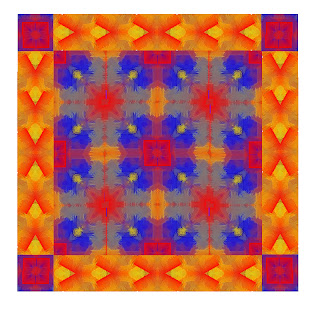

I'm currently working on Module 3, which has a design project based around fences, and which can include any of the techniques we've learnt. The module also covers printing on various media. There are two stitched pieces to be done.
Off on Friday for a day with out tutor, to "play"!!

Tuesday, 9 January 2007

Stitch samples

I've decided not to do the Take a Stitch Tuesday challenge. It's a wonderful idea, but just another opportunity for not getting on with what I really should be doing!

Here is a series of samples I did using chain stitch, all of which have just been posted off to my tutor. I absolutely loved doing them, but I could have done loads more!


Sunday, 7 January 2007

Collograph 2

At last, I have been able to get back to doing things. Christmas preparations took over needless to say, and then I got a tummy bug, which I took ages to get over.
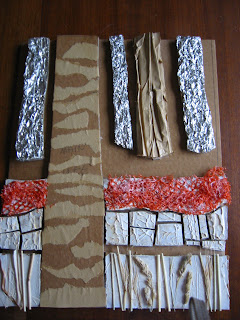
So, here is the completed collograph, everything stuck down and varnished and ready to print. I made each of the elements separately, and stuck them down using double-sided tape. I just used the varnish my husband had in the garage - it was a quick drying satin varnish, but I don't think it's critical!
.
I found making the collograph quite difficult. Everything has to be level or it won't print properly, but I found different papers can make a big difference.
Firstly I tried ordinary copy paper, I laid the collograph on the paper and then used a roller. The result was OK, but it didn't make the most of the texture. Then I tried laying the paper on the collograph, but it moved about too much, and you get a double image.
Then I tried some handmade papers, which are much softer. I laid the paper on top of the collograph and used my fingers and the side of my hand to press down. You can really get the paper down into the textures and I was really quite pleased with the results. I also tried it with tissue paper and that also works really well.
The first below is the handmade paper, and the second is the tissue paper, which I crumpled up before I made the print.
So I have to pack everything up now and send it off to my tutor. I hate packing my work up and putting it in the post. I'm always so relieved when it arrives. It takes me long enough to do the work in the first place, let alone having to redo it because its been lost in transit!!